OVERALL RANKINGS

_____________________________________________________________
1. The Tower of Terror - Score = 💀💀 - Two Skulls
Attempts to Beat: 8

The story begins in a pretty bog-standard fashion, as we are playing as a student of the Grand Wizard Eleutheria, and having been attending his school of magic for the past 4 years, we are well versed in not only casting spells but sword combat and martial arts as well. However, even though we only have 1 year of study remaining, we find that we cannot bear to remain at the school any longer, and wish to head out into the world in search of adventure. So, we decide to do just that, and we pack up our belongings and begin trekking toward the town of Darkblood, which is currently under the thrall of an evil wizard whose name we later learn to be Belenghast. Upon arriving in Darkblood, we learn from the locals that we will need to locate something called the Amulet of Stone which is hidden somewhere in the tower that serves as Belenghast's lair if we wish to defeat him. Quite convenient that we run into locals who know all this mere moments after we arrive in town, but we decide to take up the quest in any case and begin the adventure by entering the tower.
The game system here isn't even trying to hide the fact that it's ripping off Fighting Fantasy, with your initial stats of Dexterity (Skill) and Strength (Stamina), although it mixes it up a little by including a Courage stat as opposed to Luck. Gotta hand it to them that even back in 1985 they perhaps realized that the Luck stat didn't really work all that well, so attempted to bring in something else to replace it. The Courage stat isn't a bad idea either, as you can gain or lose points from your starting value depending upon if you perform a brave action or if you should suffer some sort of terrible fright. You can then at various points in the quest have your Courage stat tested to see if you are able to keep your wits about you in a key moment. And I will also note that your Dexterity and Strength scores are determined by rolling one die and adding 8 to get your Dexterity and rolling two dice and adding 15 to get your Strength as opposed to adding 6 and 12 respectively as in Fighting Fantasy, but c'mon, who are they kidding. (Especially when they add a line about your scores never being able to go over their initial levels). Combat also works exactly the same as it does in Fighting Fantasy, with the obvious exception of not having Luck to help aid you in battle, which unfortunately removes the small bit of strategy contained in the FF system.
One of the highlights of the opening though is the introduction of one of my favorite type of spell systems, where you are provided a varied list of 13 different "one use only" spells (or potions in this case), of which you get to choose 6 to take with you. A couple of these stood out to me as being far more valuable than the others (Fear and Duality both seem particularly powerful) along with a third spell you will probably need should you wish to defeat Belenghast during the final battle. Finally, the game system includes a provisions system (called Rations here), where you begin with 5 Rations that restore 5 Strength points each, and which you can eat at any time you like except for when you are engaged in battle. I like this starting number for Rations, as I always felt that Fighting Fantasy adventures which provided you 10 Provisions to start was often too much (except for something like Caverns of the Snow Witch of course, in which it was probably too few!). After this solid start mechanically however, it's mostly downhill from here.
I must say, the layout of Belenghast's lair does not come across to me as a tower at all. First of all, what kind of lame-ass tower only has two floors? And second, this must be the widest tower in existence, as you continually find yourself travelling north all throughout the quest. I was told I continued north so many times I was half expecting to emerge at the Fortress of Solitude. I think author David Brunskill may have forgotten this was in fact supposed to be a tower, as it feels much more like the standard underground complex we are accustomed to traversing in fantasy adventures. And while the quest starts off well enough in the opening sections in describing the passages you are travelling along, this aspect is all but abandoned not even halfway through, and from that point on the passages are given very little description or atmosphere, and it is a continuous stretch of being asked things such as "you come to a junction, do you go east or continue north?" Also, seeing as how this is supposed to be a tower, it was strange that I don't once recall ever coming across a window. And incidentally, how do our characters always know exactly in what compass direction they are heading while travelling these indoor lairs which have passageways that are continuously twisting and turning? Although that is a question regarding far more gamebook adventures than just this one.
The creature encounters fare little better, as once again it starts off on pretty solid footing, with 3 required fights put on the player extremely early (against a Giant, a Troll, and a Zombie), but then after that comes a long stretch of a whole lot of mostly nothing until you reach Belenghast himself. To be fair, there are a couple of puzzles in the back half, but this isn't nearly enough to break up the tedium of you travelling down empty corridor after empty corridor. Heck there are even a couple of rooms you can enter where you find nothing of interest and just turn around and head back out again. It also doesn't help that one of the puzzles is the umpteenth "one of us lies and one of us tells the truth" riddles that we see in gamebook adventures. I wish I had started a project to record all gamebooks where this type of riddle is told. Maybe this is something to do in the future. This lack of encounters renders a lot of the magic system meaningless too, as there might only be one particular place to use many of the spells, and you don't really need to use them all that much anyway. On most playthroughs I only found myself using 2 or 3 of my total of 6, and with the exception of the spell to use just before the final encounter, I'm not sure you really need to use any of them.
The Amulet of Stone isn't all that hard to find, and is located in a rather strange place seeing its importance. The final fight against Belenghast isn't anything to write home about either, as you won't find any back-and-forth trading of spells here. As long as you select the proper spell right before the final encounter, you shouldn't have too much trouble defeating him (providing your Dexterity score isn't woefully low, although if that was the case then you likely wouldn't have made it this far anyway). The adventure then ends somewhat strangely, as the final victory "section" actually covers three separate sections (198,199, and 200), so I guess Brunskill was hard up to reach the 200 section goal. What I felt was the best adventure from the Warlock Magazine series was the quest that clocked in at 172 sections, with that number not affecting my opinion of the quest at all, so I'm not sure why the authors sometimes feel the need to stretch it out to make some arbitrary goal of a section count that ends with a "0". Anyway, once you defeat Belenghast you return some jewels he had stolen back to a local temple, then decide to rest in Darkblood for a bit before proceeding on your way in search of more adventures. Based upon how this ended, I wonder if we will see this same character again in the series?
Ranking: Being the first Proteus adventure, I obviously don't have any other entries to yet compare it to, but in a lot of ways this adventure reminded me of Rogue Mage from the Warlock series. In looking at what I said in my summary for that one, I could paste pretty much the same for The Tower of Terror:
"Yes it's on the boring side, but it's not terrible. It's a by-the-book-dungeon-crawl-kill-the-wizard quest that also happens to be very easy. There is really nothing here to help it out in terms of story, design, or atmosphere either."
The exception here being that I wouldn't call The Tower of Terror "very easy", as the only few enemies you have to fight do have decently high Dexterity scores. There is also a magic system at work in this adventure, which helps to give it a leg up over Rogue Mage, even though I felt this magic system was somewhat underused. Perhaps the magazine wanted to start with a simple, standard, fantasy dungeon crawl in order not to scare off potential readers with anything too "out-there", but even so there was a lot of room for improvement here. I wasn't a big fan of the opening original entry (The Dervish Stone) in the Warlock series either, but those got generally somewhat better as the series progressed. I hope the same holds true here or I could be in for a long, long slog.
______________________________________________________________
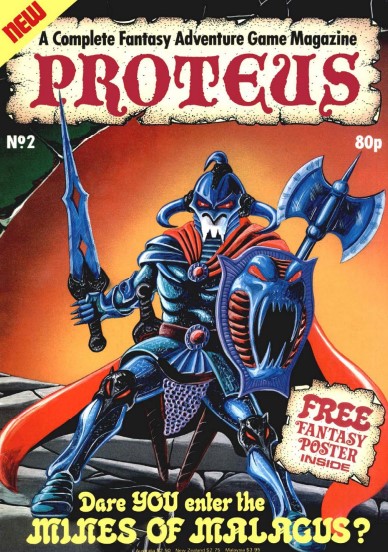
2. The Mines of Malagus - Score = 💀💀 1/2 - Two and a Half Skulls
Attempts to Beat: 5
Before you head off towards the mines, Nytrak provides you with a couple of one-use spells, these being Healing (restore your Strength to its initial level) and The Light of Darkness (basically an insta-win combat spell, although it can only be used in a few places), along with a length of rope he says you will need should you encounter something called the Crocotta. This felt like a weak attempt at trying to introduce a magic system, when these one-use spells could just as easily been a couple of items instead. When you first enter the mines, you are confronted with a choice about which direction to take, and are provided 3 options. You don't realize it at first of course, but you can lose the adventure right here should you not select the one correct option. This is because the mines are broken up into 3 areas, with each containing one piece of the headstone, and these 3 areas must be traversed in a specific order. There is no backtracking allowed between the areas, so if you don't select the one correct direction right off the hop, you can't win. However, I didn't have a problem with this, because I fully hope to play an adventure at least 3 times anyway, and part of the fun in gamebooks is figuring out the exact order in which you need to do things. And even if you do go the "wrong" way at the start, it's not a waste as you can take the opportunity to explore the area that you find yourself in, hopefully uncovering the location of the headstone piece in that area, so as to be ready for your final "summit attempt".
Each area of the mines sees you wandering around the corridors, having to fight various strange creatures and perhaps solve a simple puzzle in order to obtain the headstone piece located there before moving on to the next area. This is both the adventure's greatest strength, and its greatest weakness. Strength in the fact that it can be fun figuring out what you need to do in order to obtain each headstone piece, as you often need to acquire an additional item hidden in the mines that will allow you to do so. There is also a nice "A-ha! Got one!" feeling when you uncover each of the sought after pieces. The greatest weakness also relates to this though, because the biggest problem I had with the adventure was in trying to map out the mines. Yowza! The author must have attended the "Luke Sharp School of Map Design", because the passages in the mines, at least for me, did not seem to line up at all as to where they should based upon the information given. I eventually just gave up even trying to map it out, and instead used the section numbers I knew I needed to get to, and which ones contained an instant death to avoid (looking at you section 85!), and I would then just keep circling around until I stumbled across the section I was looking for.

The creature encounters in the mines are not really all that difficult, and thus any difficulty in the adventure comes from avoiding any insta-deaths and by plotting out the correct order in which to acquire all the headstone pieces. The puzzles also felt on the easy side to me, and yes, we once AGAIN have variations on the "one of these are lying and one are telling the truth" riddles. Maybe I will just keep a running tally of how often these occur in the entries just in this series. So far we are 2 for 2! Once we have arrived at the correct sequence in which to gather the pieces, we successfully join them together and carry the headstone back to the village. The adventure tries to convey the weight of the headstone by docking you 1 Strength point for each piece you find, but still, we must either be incredibly strong or this headstone is really made of foam if we are able to lug this back to the village by ourselves. When we finally return with it, we are met with little fanfare (what, no parade?), and Nytrak rewards us with the paltry sum of 100 gold pieces before we head on our way to order a nice meal at the tavern and seek a new quest. This entry also needs to stretch to hit the 200 section count, as the final victory "section" covers both sections 199 and 200.
In comparison, I found the writing here to be better than the previous adventure, with an improved atmosphere and more varied encounters. Although one line did give me something of a chuckle...."You are facing a beast the size of a tiger, but the shape of a wolf" (So in other words, a large wolf?). However, I'm not sure how I feel about all the made up creature names found throughout the quest, such as: Nasnas, Kharg, Kife, Spitsnipe, Lape, Hagrob, etc. At least, I assume these were made up just for this adventure, as I don't recall hearing them anywhere else, but I could be mistaken. And as with the previous adventure where we were supposed to be travelling through a tower, I never got the sense here that I was inside a mining area, as I don't recall ever coming across any mining equipment, and why would there be an actual constructed labyrinth down here?
Ranking: So with this adventure I have opened up the option for myself of using "half skulls" in the scoring. This issue was a touch better than the previous, but not as good as some of the Warlock adventures that I awarded three skulls, so I feel settling it in at two and a half sounds just about right. As far as The Mines of Malagus goes, I did enjoy it more than The Tower of Terror, despite the lack of a spell system which that first issue contained. There is a lot more to actually do in this quest, and it was decent fun trying to plot out where all the headstones could be found along with various items that you would need to obtain them. I felt the design of the mines themselves though was a bit of a mess, and some of the aimless wandering could get tedious. The adventure also ultimately failed to provide me with the answer to the biggest question of all......just who the fook is Malagus anyway? I don't believe this is ever explained. Was this name chosen just because it begins with the same letter as the word "mines"? (Join us next issue for...."The Caves of Crynn"!) It appears Proteus may have been stealing Fighting Fantasy's naming conventions as well!
______________________________________________________________
3. Shinderg's Tomb - Score = 💀 - One Skull
Attempts to Beat: 9

In this adventure from author Richard Barron, the year is 2058 AD, and.......hang on a sec, does that date mean this entry is set on Earth? And not only that, but a relatively near future Earth (only 73 years in the future from when this was written in 1985). Well that part at least really piqued my interest, and I was then curious to see what the author had come up with for our future. Unfortunately, there is nothing else within either the introduction or the adventure itself that would follow up on this, and that reference about it being 2058 AD might as well not have even been there. Pity. Anyhow, we learn that the world we now live in suffered through a great war 40 years previous to the events here, and was a war which claimed the lives of 30 million people. The world has since been divided into 4 sectors (creatively titled North, South, East, and West), and the evil Zartog, ruler of the Eastern sector, has begun his plan to take over the rest of the world by sending forth his dreaded Bewo Warriors and mutant anti-world creatures (?). We also learn that we are the last surviving member of the "Inter-Sector Brotherhood" (whatever the hell that is), and it is our duty to stop Zartog by re-assembling an artifact known as the "Key of Peace". The Key was previously split up into four quarters, with each quarter being left with someone within each of the sectors. So we thus need to travel to each sector, obtain each piece of the key, and save the world. We will have some powerful aid though, as being the sole survivor of the Brotherhood, we are entitled to the warrior's crown and the steel shoulder-badge (?) which will endow us with magical powers. Before we set out, we are additionally granted an audience with Shinderg, the Supreme God of the New World, who appears to us clad in robes of Grigon (?), and gives us some hints on how to obtain the pieces of the key through the use of some cheesy poetry. (What, no "Roses are Red, Violets are Blue, Look to the South, and in the North too!") Phew! Everybody got all that? Bloody hell I sure didn't. After reading the introduction the first time, I had to immediately go back and read it again, having very little idea about what the heck was going on.

Before we begin, we learn about the powers that have been bestowed upon us. We start the adventure with two "Geo-Secular Powers", those being Flight and Invisibility. In addition to those, we also get to choose an additional four "Low-Order" powers from a list of nine. These include: Zephone (magic), Fire Breath, Prophecy, Enchantment, X-ray vision, Knowledge, Underwater Breath, Run Really Fast, and Healing. Each power you select starts with a score of 15, and each time you use it, you roll two dice and deduct that amount from the points you have remaining. Therefore as long as you have at least 1 point for that power remaining then you can still use it, but once the points fall to 0, it is no longer available to you. On the surface of it, this is very cool. Once you start playing the adventure however, not so much. First off, the Zephone power is described as "enabling you to perform feats of magic which may help you through your perilous journey". Could that be any more vague? That also basically encompasses all the other powers too, so this power alone should allow you to do pretty much anything you want. You can also only use the powers when given the option, and there only appear to be a couple of places to use most of them, and some of them I'm not sure are ever used at all. The Healing power is also a bit of a problem, as it is described as "enabling you to restore yourself to good health and fitness". What exactly does that mean? Restore your Strength to maximum? I'm not sure it even matters anyway though, as in my 9 playthroughs I was never given the option of using it! Perhaps you were supposed to use it at your own discretion, but none of the other powers work that way, so if that was the case it only would have taken one sentence in the rules to explain it. Bah! These powers ended up becoming an incredibly aggravating inclusion to me which I will discuss again later.
There is also a big notable change to the game system, in that there are no Dexterity or Courage attributes here, only Strength. The way combat works is that both you and your opponent roll two dice each, and the higher score wins with the loser deducting 2 Strength points. Ok, so not nearly as bad as One-Strike-Combat, but still an over-simplification if you ask me, because now effectively all combatants in the world are equally skilled, which means the odds are against you surviving more than a few fights depending upon the Strength levels of your opponents, and even a low Strength opponent can take a huge bite out of your remaining points. Fortunately, there are only a few unavoidable combats in the adventure, as a couple of the enemies you need to go through can be bypassed by having the correct power. Even this can be quite anti-climactic though, as there is one particular enemy called Gorf that you have to get past, and he is even talked up in the introductory poem. However all you have to do is use your Invisibility power, punch him twice in the stomach, and then watch him die without a fight. (Just how hard can I punch anyway?).
So in order to collect all the 4 pieces of the Key of Peace, we need to not only visit each sector, but also do it in a specific order. Shinderg's poem helps you to determine which order to do the sectors in, so that was at least something I appreciated. I won't give away the sector order, but the first couple of key pieces I found incredibly easy to obtain (the first one is even just immediately handed to you). The third one was a bit more involved, but I still managed to get it relatively quickly as well, and at this point having already gathered 3 of the 4 pieces, I was wondering just where all the sections of this adventure were going towards, because this quest was on pace to being over extremely fast.
But then we get to far and away the worst area of the adventure. Trying to obtain the fourth and final quarter of the key. *shudder*. So you learn that there is a secret tunnel that joins two of the sectors together (and these sectors are supposed to be separated by the sea, so just how long is this tunnel?) and therefore decide to walk the entire way instead of booking passage on a ship. See you in 3 months! To be fair, we aren't told exactly how much distance separates the two sectors, but this still must be one hell of a walk. Anyway, as you go along underground you eventually find yourself entering a maze. Oh goody, because I had so much fun with the one last issue. I knew I was in for a jolly good time when at the very first junction you are asked if you want to go North or South, and are given an insta-death should you choose wrong. What made this so infuriating to me was the manner of the insta-death, as you find yourself falling into a pit, actually surviving the fall, but then are crushed when the walls close in on you. The text even says as you are falling "there is nothing you can do, nothing to cling to". Nothing I can do? Gee, it's too bad I didn't possess something akin to the power of Flight, because that would have really come in handy in saving my ass. Oh wait, I DO have that ability, but for some reason my idiot character decides to plummet to his death instead. Incredibly maddening! Turning the other way at the junction next time, you soon learn as you travel along that you need to locate 3 different coloured keys in this maze in order to open a door on the other side which will allow you to exit. There also happens to be 7 different colours of keys scattered around the maze, so you will also need to determine which of the 3 colours you need. Gee, it's too bad I didn't possess something akin to the power of Prophecy or the power of Knowledge, because that would have really come in handy in helping to find those darn keys and my way through the maze. Oh wait, I MAY actually have those abilities too, but it wouldn't matter as for some reason my dummy character would rather wander around aimlessly for who knows how long before randomly stumbling across the correct keys. And this really highlights a big problem with the adventure, in that you are provided with two extremely powerful abilities, Flight and Invisibility, either or both of which would be incredibly advantageous in almost any situation, but only get a few chances to use them all throughout your travels, even should you have more than enough points remaining for them. Mercy!
I feel somewhat guilty now for disparaging the maze in The Mines of Malagus, because the one here to get the final key piece is far worse. I also know at this point it probably seems like I have something against gamebook mazes, but I can honestly say that is not the case. For me, in order for a maze to be an enjoyable experience, it should: (a) give us a good sense of atmosphere (b) provide interesting creatures, encounters, and/or puzzles, but most importantly...(c) be fun to map out. Hell I would settle for even just that last one, but this particular maze does none of them. The atmosphere is basically non-existent, just a seemingly endless parade of "you come to another junction, do you go North, East, South, or West?" options with very little description provided. There are a scant few creatures to encounter, but I couldn't even tell you what most of them were supposed to be beyond what their name may have implied. The main "puzzle" involves stumbling around until you happen to come across the random location of the keys. Heck, you can even come across an inscription in a cavern that basically tells you "there are seven keys, and you need three of them". Does it even provide a clue as to which keys you need or a hint as to where you might find them? Nah. One of the more useless inscriptions you will ever come across if you ask me, because even just locating the door at the end of the maze tells you what colour keys you need and you can then head back in. I also unfortunately found out where all the sections of the adventure had gone to, because it's right here in this mess. This maze area must take up roughly half the sections of the adventure (it sure felt that way anyway, and my "map" seems to back this up), and is easily in the running for "worst gamebook maze ever" in my view. It doesn't help that it is in the second half of the book either, and contains a handful of random instant-deaths for going the wrong way. Just a tedious, annoying, maddening experience. Earlier I compared the adventure to Chasms of Malice, but that had more to do with the feeling I got while playing it, and thankfully it's nowhere near as difficult as that FF book. Another appropriate comparison might be The Black Pyramid from the "Legends of Skyfall" series, as while that was an adventure that took me "only" 10 attempts to beat, it felt like double that. The same is true of Shinderg's Tomb, as these 9 attempts went by incredibly slowly and contributed to it seeming like many more, also leaving me feeling drained afterwards.
Once you finally make it through the maze and collect the final key piece (and shave off the beard you have no doubt grown while playing through it), you have one more thankfully easy combat to go through, and then a final encounter where a Brimgeth tries to trick you into turning over the now assembled key. What I found most interesting about this is that you are told that you have encountered a Brimgeth on a previous quest, which you actually did in The Mines of Malagus. Wait a minute, is that implying that we are playing the same character here as in the previous adventure? That really doesn't jive at all with the Inter-Sector Brotherhood nonsense we were given in the introduction. And if it isn't the case, is that just supposed to be a coincidence then? I'm not sure why you would even mention it otherwise. Anyway, once we use our "which-way-did-he-go" Invisibility power to get past the Brimgeth, we successfully return the Key of Peace to the tomb of Shinderg, bringing peace to the world in the process in yet another victory section that takes up the last 3 sections of the adventure. It was odd that we never did encounter Zartog, I guess he just gave up? The introduction also mentioned that whoever joined all pieces of the Key together would be granted superhuman powers in which to help ensure peace, so I suppose we are meant to enforce said peace by becoming Superman or some such, and I would think our character's real work is just beginning, but the final sections don't really read that way at all, and has you licking your wounds ready to head off in search of a new quest. On that note, I dearly hope there isn't a sequel to this!
So was there anything I liked about the adventure? Well, it did have some creature creations that I found interesting, most notably the spider-like Coryplex, but then I'm a sucker for a horrific spider creature. Gorf could have been an interesting inclusion as well if the author had given him a couple of cohorts named Gradius and Galaga, and somehow tied their naming back into the concept of this being set in a near-future Earth, and if he had I would have awarded some amusement and cleverness points. I also appreciated the idea (in theory at least) of how obtaining the key pieces became increasingly difficult with each successive one, though in practice this went completely awry. And in that vein, the author also appears to have some sort of key fetish. The "Key to Peace" being an actual key is one thing, but even after taking into account the 4 quarters of this key we have to find, we also have the 7 different coloured keys in the maze, plus an additional 3 golden keys that you need to find earlier in the adventure in order to open a gate. This last example is really quite curious, because why did this need to be a set of 3 keys? You find them all in the same place, and they all open the same gate. Couldn't this just have been one key? Nitpicking maybe, but this only stood out because of the strong "key theme" running throughout the quest.
Ranking: Well this sure was a kick in the Shinderg's. A glimmer of some good ideas here and there, but the execution is bad on several levels. A mostly non-sensical story, along with giving you all kinds of powers that you can barely use is one thing, but what really kills this is the maze area to obtain the final quarter of the main key. This has to be the most tedious and boring maze I have yet gone through (and THIS time I really mean it!), while at the same time one of the most rage inducing. This isn't just a small part of the quest either, as it appears to take up close to half the sections of the adventure. Easily the worst entry of the series so far, and although it's still early, this series is not looking too good at the moment.
______________________________________________________________
4. The Forgotten City - Score = 💀💀 1/2 - Two and a Half Skulls
Attempts to Beat: 1

On to issue #4 and a return to the more standard style of story, along with a return by author David Brunskill, who penned the first two adventures in the series. In this entry we play the typical wandering adventurer, who while dining in a tavern one night, is approached by several refugees from the nearby city of Meldoin. These refugees are looking for a sword-for-hire, because their city has been taken over by the evil wizard Chaladon and his army, and who has since turned the majority of the citizens into mindless zombies who obey his every command. They tell you that should you be able to kill Chaladon, the newly-freed townsfolk would then rise up against the remainder of the wizard's army and drive them from Meldoin. An assassination mission it is then! There were a couple of wrinkles added, as it is also explained to us that Chaladon draws his power from a spell book, but also has two "fake" spell books he keeps around, presumably to fool thieves or anyone who seeks to challenge him. We also learn that there are certain elements among Chaladon's followers who might be willing to aid in overthrowing him should the price be right. Thus armed with this knowledge, we wait until dusk and set out for the city.
For the gameplay mechanics, there is really nothing special going on here. We have only the standard Dexterity, Strength, and Courage attributes, along with our Rations (6 meals instead of 5 this time for some reason) and 20 Gold pieces to start. The only new addition would be that we also begin the quest with 2 meals worth of "herbs", that when eaten will restore all our stats back to their initial levels. No spell system here, which is ok as we can't always be playing as a magic-user I suppose. Something that did immediately jump out at me though was the length of this adventure, as it clocks in at 275 sections total as opposed to the usual 200 that has been the standard for the series so far. This then had me fully expecting this to be a longer adventure than the previous issues, but it actually didn't play out that way at all.
So once you make your way inside the city, this is your basic item-hunt all the way. This in itself is perfectly fine, but I found all the items quite easy to locate. As long as you investigate everything you come across, you will likely find everything you need in quick succession. I beat this on my first try, which very well could have been dumb luck, but it didn't really feel like it was. It's not like I rolled up an extremely powerful character either, as my starting stats were Dexterity-12 (and in this game Dexterity is 1d6+8), Strength-21, and Courage-8. There are in fact a couple of Dexterity-12 opponents in here, but thanks to the Rations and also consuming the restorative herbs just before the final battle, my Strength never dipped into "code red" levels. Looking back after I had beaten it, there does appear to be one or two Courage rolls that if not passed will likely result in failure (which I obviously passed), and this kind of thing stinks, as I hate it when success or failure in a quest can be determined by one single solitary roll.
You travel along through the darkened and deserted streets of the city, investigating houses, a sewer, an island in a park, and some tunnels, gathering various items such as keys, rings, and stones (each with their own use later), until arriving at Chaladon's palace. Considering the expanded number of sections in the adventure, and how quickly I seemed to arrive here, I was expecting this palace to provide a rather large building to explore, but no, it consists of 6 rooms and a hallway. This has to be the most disappointing palace I have ever explored. Where exactly did all the sections in this issue go to? I was able to easily fit my map for this adventure on one sheet of paper, while previous gamebooks with much less sections have often taken me two pages. That said, despite its smaller than expected size, this adventure was quite fun to map, which is always a huge positive for me. I have mentioned elsewhere that the desert setting in gamebooks is one of my favorites, but the urban setting is up there as well and I believe may have overtaken it. I suspect I am far from alone among gamebook players in this, as the city setting opens up so many opportunities for sneaking around and exploring taverns, palaces, sewers, gardens, dark alleyways, and creepy houses such as we have here. Not to mention the various unsavory individuals you will no doubt come across. As short as this adventure was, it did do a really nice job with this, and I found the atmosphere and encounters here to be a real strong point.
But guess what? We are back to having a puzzle posed to us that takes the form of the "one is lying and one is telling the truth" variant. In fact, there are TWO such puzzles here given back-to-back! That makes this series 3 for 4 in adventures which contain these (and if I missed one in Shinderg's Tomb, I hope someone will let me know), and these are clearly a "go-to" puzzle for author David Brunskill in particular. I have come across so many of these in my gamebooking adventures that they are not even remotely a challenge. As such, the whole business regarding the two false spell books that Chaladon keeps around falls flat, because you determine which of the spell books is the real one by solving these truth/lie riddles. The final fight with Chaladon was a letdown also, as no magic is involved despite this supposedly being a powerful sorcerer you are confronting. I can't help but feel a bit gypped whenever there is a final battle against an evil wizard and they don't even cast spells, which should be their main form of attack, and which doesn't make them any different from most of the other creatures you have fought against to get here, perhaps just with higher stats. Once Chaladon is defeated, the townsfolk are freed from their trance and rise up as predicted to evict his army from the city. You are then celebrated as a hero and are allowed to keep the gold in the palace that Chaladon had obtained through prior campaigns, making you "rich beyond your dreams". I'm sure the innocent people that Chaladon tortured and robbed to get this gold would like to have it back, so in keeping it for ourselves I guess we aren't THAT much of a hero.
First attempt victory! I don't recall having one of these in awhile, and needed to go back and check my records to see the last time it happened, which would have been Gates of Death, book #13 from the "Advanced Dungeons & Dragons" series, which was indeed a bit of a while ago. This initially gave me the false impression that completing a gamebook on the first attempt was rare, but consulting my records further had me remembering that this has happened more than I realized, with me winning on my first attempt at: 2 of the first 12 main series "Lone Wolf" books, 3 of the 8 "Marvel Super Heroes" books, a whopping 3 of the 4 "Sagard the Barbarian" books, 3 of the 18 "Advanced D&D" books, 1 of the 6 "Middle-earth Quest" books, and now this "Proteus" adventure. Perhaps not surprisingly due to its reputation for difficulty, I have yet to win a Fighting Fantasy book on my first (or even second) attempt after playing 40 of them so far, as even the easiest entries for me from that series (Forest of Doom, Scorpion Swamp, Demons of the Deep, Stealer of Souls, and Portal of Evil) all took me 3 attempts, with Stealer of Souls probably being the one of those I had the best chance of doing first go, but ultimately wasn't to be. While I am usually greatly disappointed in beating a gamebook first try, that can be overcome if I am provided a fun thrill-ride adventure with interesting encounters and great atmosphere, with the two "Lone Wolf" books I beat on the first try (Shadow on the Sand and The Masters of Darkness) being the best examples of this. Unfortunately, while The Forgotten City is a good enough adventure, it isn't strong enough to totally overcome the lack of challenge it provided me.
Ranking: A decent enough little adventure, though already fading from memory a day after finishing it. This is likely due to only playing it once, and I have to admit I found the challenge level to be disappointing, with it seemingly coming down to, for the most part, whether you can pass the Courage checks or not (so mileage may vary on the difficulty front). Did I enjoy it more than The Tower of Terror? Yes. Did I enjoy it more than The Mines of Malagus? Hmmm, that's a tougher comparison, and I have them both with the same score. I have to give The Forgotten City the tiebreaker though, as even though I preferred the higher challenge of the Mines of Malagus, I felt the setting and encounters to be much more interesting in this adventure. This means that, in my opinion, Brunskill's entries have gotten slightly better with each installment. I'm not just sure yet how many of the Proteus issues he has written, but if he can keep up this pace we could have some classics by the time we reach issue #20.
______________________________________________________________
5. Caverns of the Enchantress - Score = 💀💀💀 - Three Skulls
Attempts to Beat: 6

Alright, let's rock an enchantress' world! This issue sees us playing as, yet again, the nameless wandering adventurer, but I appreciated that a bit of a spin was put on it, as we play as somewhat of an adrenaline junkie who does what he does for the thrill of it all, and not necessarily for the pursuit of riches. With little more than the clothes on our back and the sword at our side to our name, we stumble into a cabin within the Forest of Eln one day, and there meet Pelorath, the Sorcerer of the Forest. After providing us with some food, Pelorath also gives us a one-third piece of a medallion, and tells us that should we be able to find the remaining two pieces and join them all together, the medallion will reveal the location of a great treasure. He also goes on to tell us that the remaining pieces lie within caverns located to the north. Of course, our thrill-seeking character cannot turn down such an opportunity to get his adventuring fix, so we decide to go in search of the other two medallion pieces. Before we leave, Pelorath gives us 3 oak leaves, and explains that each one will aid us in a time of evil, and to use them wisely. (It just occurred to me, do people actually need to use the phrase "use them wisely"? Doesn't that kind of go without saying?). Curiously, Pelorath does not mention the Enchantress that is currently using these caverns as her lair, and that seems like a pretty big omission on his part, especially as he clearly knew you would be encountering evil within the caverns. Of course, we know what to expect from the title of the adventure, and I am nothing if not an equal-opportunity villain-slayer. So we leave the cabin, quickly find the caverns, and plunge on into the darkness....
Ok, so up to this point the magazine had clearly been riffing on Fighting Fantasy, but that is dialed up even further here. The Dexterity attribute, which had been calculated as 1d6+8, is now brought down to 1d6+6, and the Courage attribute is replaced with a Fate/Fortune stat (couldn't they have picked one name or the other?), so basically all pretenses are now completely out the window. The Rations remain for this adventure, and other than the 3 oak leaves given to you before you begin, there is nothing special about the mechanics here.
There isn't anything all that special about the quest itself either, as once you enter the caverns it plays out pretty much as you would expect, with you navigating through the various tunnels and rooms searching for the location of the two remaining medallion pieces before moving on to the final battle with the Enchantress. Most of the encounters were fairly interesting though, including a Lizardman in a river, a shapeshifting Dragon who tries to entice you with sexuality (I think that is what it is trying to do anyway), and a Werewolf sleeping in a coffin for some reason. There is also a sad meeting with a Lion King (a-wemoweh-a-wemoweh) that has been turned to stone but can be brought back to life if only for a short time, and I always appreciate moments like these that add some pathos to the proceedings, as we know these evil places must be filled with such stories. The real highlights though are probably the encounters with the Enchantress herself, and she is realized with just the right amount of arrogance and malice. That said, she is not particularly difficult to defeat, and the real "end boss" here occurs in the form of a Demon you must fight just before the final meeting with her. I enjoyed how this Demon is apparently the bookkeeper or some such for the caverns, as you come across him as he sits at a desk working away with his quill pen (as pictured on the cover). He is no pushover though, and with stats of Dexterity-11 and Strength-16, any low Skill Dexterity player is in big trouble, and probably even a moderate Dexterity character too. Once the Demon and the Enchantress are dealt with, you have one possible final encounter with a Golem (though it can be avoided) before moving on to the final room which contains the treasure that Pelorath spoke of. I was somewhat disappointed that this treasure amounts to a roomful of gold and jewels, as I was hoping for something a bit more original that would suit our character more, and even we ourselves then ponder how a life of luxury that such riches will bring really isn't our style.
Overall I felt the difficulty level for a magazine adventure to be about just right, although I did have to take advantage of something that wasn't really explained all that well. There is one location where I managed to pick up a scroll that restored both my Dexterity and Strength scores to their initial levels, but could only be used once. Unlike the rules regarding the Rations that state they can be used anytime except when in battle, no such restriction was mentioned in regard to the scroll, so I used it during my fight against the Demon when my Strength reached 2 points so as to jack it back up to maximum. This seemed plausible, as uttering a few lines that you memorized from a scroll is far more believable than fighting your opponent with one hand while you munched down on a chicken leg with the other. I don't think the oak leaves worked all that well though, as they too often felt like an overpowered "get-out-of-jail-free" card, allowing you to instantly destroy most enemies, albeit at the cost of the leaf itself. Not to mention the one encounter you really needed it for, the Demon, you are not even given the option of using an oak leaf. I'm not saying doing so should have resulted in an instant win, but even if it knocked some Strength points off this beast it would have been better implemented. And perhaps only providing you with one single leaf for the whole adventure would have been the better way to go, as 3 felt like overkill from a combat standpoint throughout the rest of the caverns. There is additionally one of the weakest floor puzzles I can recall seeing. It involves you entering a room with a 3x3 coloured grid on the floor, and you must decide which colours to step on to make your way across the room to the exit. At first I thought this might be a chance to put what I learned about rainbows in school to good use for once (will ROY-G-BIV ever come in handy in my life?), but the answer turned out to be even simpler than that. It doesn't really matter much anyway, as stepping on the wrong coloured stone results in a whopping penalty of 1 Strength point.
What is a pretty average adventure on the surface is brought up to a level a bit above average thanks to the strong and immersive writing by author Elizabeth Caldwell. The writing of the issues up to now has been decent, and David Brunskill has even shown improvement as his adventures have progressed, but Caldwell here elevates the prose we have seen up to now even more. I kind of wish something more interesting had been done with Pelorath, as it felt like he was trying to trick you into retrieving the medallion for him, but nothing ever comes of this. However, the encounter with the Lion King and the final meeting with the Enchantress are highlights in terms of the writing, but truth be told this aspect is delivered very well all throughout, and I really enjoyed reading this and look forward to more Caldwell adventures, if there are any. There was also included an illustration of a girl chained to a wall, which would actually be something that an enchantress would use to entice an invading adventurer, but it made me wonder if this was included for titillation purposes for the mostly school-age male audience who would not have access to, ahem, certain periodicals of the day. I know that is why I used to read certain comic books as a pre-teen!

Not that it has anything to do with this adventure, but I couldn't help but notice that this issue contains an advertisement for a real-life fantasy holiday in the "Phantom Forest". This is billed for being aimed at 9-13 year-olds, and takes place either at the Forest of Oxenfoord Castle in Scotland, or the Forest at Bilton Grange in England. The ad is vague on details, but seems to suggest some sort of role-playing adventure involving actual swimming, archery, and fencing. When I was the appropriate age (which I was in 1986 when this issue was published), and had I lived in the area, I would have been nagging my parents non-stop to send me to this until they caved in just to shut me up. Who are we kidding, this still sounds like a pretty sweet holiday to me now! It would be interesting to hear from anyone who actually participated in one of these holidays back in the day, and find out what exactly it involved and if it lived up to expectations.
Ranking: While mechanically speaking this is probably no better or worse than the previous issue, the writing elevates it into the top spot of the series so far. The story is the usual "infiltrate underground complex, collect items and kill baddie" mission, and while having an enchantress as opposed to the standard wizard serve as the antagonist might not seem like much of a departure, I found it was enough to make this feel at least somewhat fresh. With the blip of issue #3 notwithstanding, the series once again gets incrementally better as I go along, which gives me a great deal of optimism for the remainder of the issues. Hopefully not to be misplaced!
______________________________________________________________
6. The Fortress of Kruglach - Score = 💀💀 - Two Skulls
Attempts to Beat: 3

Well that was disappointing. After a nice debut with the previous issue, author Elizabeth Caldwell regresses here, as this is a step back in every aspect. After mixing it up somewhat last adventure, we are back to hunting down an evil sorcerer, in this case the titular Kruglach. It seems that many years ago, Kruglach spent time within his fortress experimenting with dark enchantments, and the villages around the fortress were thus plagued with disappearing townsfolk, sickness, and blight. These horrible events eventually ceased though, and the local villagers assumed Kruglach to be dead. Recently however, the events have restarted, and the villagers are offering a reward to anyone who can eliminate Kruglach again, who it is believed has arisen once more and is back to practicing dark arts within his fortress. The reward is only a piddling 150 gold pieces, but as in the last issue, our character lives for the thrill of adventure as opposed to monetary gain, and decides to accept the quest and head out towards the Fortress of Kruglach, which is located deep in the woods. This made me feel like I was playing the exact same individual as last issue, and it's a shame Caldwell didn't tie this together somehow.
On the way through the woods, we encounter some sort of "friendly demon" (I'm not sure how else to describe it, but it's pictured on the cover), who relates to us that it was him who ended Kruglach's reign of terror the first time, but some idiot mortal has apparently freed him, and therefore another mortal must capture him again. In order to do this, we will need to perform a Spell of Soul Capture on Kruglach, but first there are many items we must acquire. In order to cast the spell, we will need: three hairs from a Werewolf's tail; two teeth from a Cyclops; and the Eye of a Sorcerer. Oh, we will also need a special receptacle to hold his soul, and also two talismans to protect us while casting the spell, those being the Horn of a Unicorn, and a feather from the wing of a flying horse. (Is he just making all this stuff up?) No problem! I mean, what are the odds we are going to find a Werewolf, a Cyclops, and a Unicorn within what is supposed to be a near deserted fortress? Well, I would say any gamebook player would know the odds of this are 100%! Snarky comments aside, I do appreciate a good item hunt, especially when we know going in what we are looking for, as it might allow us to use common sense in tracking some of the items down, although in most cases complete randomness usually ends up ruling the day anyway.
When you arrive at the fortress however, the fun item hunt I was looking forward to doesn't really materialize, because the fortress itself seems very small. Much like with The Forgotten City, I was left wondering what happened to some of the sections here (although to be fair this adventure is only 200 sections as opposed to the 275 of that previous quest), because there can't be more than 10 or so rooms to investigate, and most of the items you need to acquire are rapidly found. The final two items, the Werewolf hairs and the Cyclops teeth, are the only ones that felt like you might have to put some work in to acquire them, but even then these guys aren't what I would call well hidden. The rooms in the fortress allow you to snake your way back and forth as you map it out in order to collect everything you need, and you are sometimes even asked what door you entered a room by, with your answering determining which door you leave by, as the adventure shuttles you off in the correct direction. I didn't find any of the rooms or encounters particularly engaging, with the possible exception of the Werewolf, but even he must have had an interesting backstory that we do not get to learn much about. You move through guard towers, a hall, a kitchen, a storeroom, a prison area, and a laboratory as you make your way towards Kruglach, picking up what you need for the spell as you go. There is also a library that you can enter and are given a choice of books to read, but anyone who was paying even the slightest bit of attention during the introduction should know exactly which one to open. And lo and behold in the great hall we have another "truth and lies" riddle! Oh no Elizabeth Caldwell, not you too! Well that makes it 4 for 6 for issues which contain at least one of these that I am aware of. Jumping jellybeans! I was only half joking when beginning this count, but now have grown very curious to see how often these will turn up.
Something noticeable I found in the adventure was the amount of filler sections. Some seemingly simple actions can take several sections, and at other times you can be given options such as tossing a pebble into a well, or choosing to just go down into it, or perhaps to listen at a door to a room or just barge in (and who wouldn't listen at the door first?). But the pebble or listen options don't lead to anything, as for instance if you choose to listen at the door, you are told you hear nothing and just barge on in anyway. I gave out about this kind of thing in the "Real Life" series, and while it's not even remotely as bad as that, I still find it annoying and a waste of time. As I have said elsewhere, if you are going to have one option lead to the exact same section as if you had chosen the other, at least provide me with something narratively interesting before sending me on my way, not just one "you hear nothing" sentence before having me proceed. Or why not have a fight against a guard or a wandering creature should you have listened at that door that otherwise wouldn't have had time to see you had you just gone in? Because these choices exist to pad out the section count is my suspicion. The writing itself is a step back too, as while still quite good in some places, overall it is lacking in the quality that Caldwell's previous adventure contained. For these reasons, this issue has something of a "rushed" feel to it.
Also like with The Forgotten City, I could very well have beaten this on my first attempt. On that first try I made it all the way to Kruglach himself, missing only one of the needed items (the Werewolf hairs), and on my second attempt I had a very unlucky roll while attempting to lasso the Cyclops (yes, really) and then lost the following fight against him, before beating the adventure on the third attempt. The final encounter with Kruglach himself is a colossal disappointment. You enter a black cave where he is apparently just standing there, and perform your Spell of Soul Capture, which traps him within a crystal bottle. Not only is there almost no characterization of Kruglach given, but he doesn't even say anything! (Unless you consider ARGHHHH to be a line of dialogue). It is apparently possible to get in a swordfight with him (and in this case he does utter one line), but even should you somehow defeat him with his Dexterity-13 score, you still lose the adventure! And after all that, we don't even learn who it was who freed Kruglach in the first place (or at least I never did, although I suspect it was the dirty werewolf). So after beating this adventure, I was left with a "is that it?" feeling, which is not a good thing.
Ranking: Certainly not the worst in the series so far (beating Shinderg's Tomb on that front is going to take some doing), but certainly not the best either. A comedown in all areas from the previous issue, although you could argue there are worse ways to spend an hour or two in the evening. I put it in the middle of the pack so far, just ahead of The Temple of Terror and just behind The Mines of Malagus. This is my shortest review in the series to date, because very little stands out that much to talk about. On to the next issue and hopefully a return to the improvement the series had been showing before this adventure.
______________________________________________________________
7. The Sceptre of the Elvenking - Score = 💀💀💀 1/2 - Three and a Half Skulls
Attempts to Beat: 12

And return to the improvement it did! Author David Brunskill checks in with yet another incrementally better entry for him, and provides an adventure that I really enjoyed. The quest begins with what must be the shortest introduction I have seen in a while. You are the typical adventurer having dinner at an inn within the town of Thorndrake one evening, when a ruffian calling himself Fallagon attacks you, and you kill him. That's about all the information you get before being sent to section 1, and I have to say I rather liked this approach. Beginning the adventure in this manner adds a certain bit of mystery to the proceedings, as we have no background information on what the focal point of this quest will be (other than what we can surmise from the title of course) and we aren't even given any clue as to who this Fallagon guy is or why he hates us so much as to attack us in a busy tavern (and he even attempts to gouge our eyes!). Unfortunately, the adventure doesn't capitalize on this very well, as the opening sections see us fleeing through the streets of Thorndrake as we attempt to escape from Fallagon's comrades. This could have been something interesting, but I found myself escaping the town very quickly and without much effort, with you needing to choose in which random direction you wish to flee. Once outside the town of Thorndrake is where I would say the adventure really begins.
So immediately after leaving the town, you happen upon an elf by the roadside, and it then becomes clear as to why the introduction to the adventure was so short, and it's because the whole prologue is basically given to you by this elf in a very long exposition sequence. The elf gives his name as Aalandrin, and relates his tale of woe. It seems that several nights ago, Aalandrin's elven tribe in the forest to the east was attacked by a barbarian army led by their warlord, known as Tyran. After a fierce battle, the elves managed to repulse the attack but only at great cost. During the fighting, the elven king Gallibran was mortally wounded and even now lies at death's door, with the only thing that can save him being his magical sceptre. Problem is, Tyran managed to make off with the sceptre when he fled back to his headquarters located inside the Temple of Eternal Darkness (catchy name). It is to this temple that Aalandrin is now headed in an attempt to reclaim the sceptre and save his king, and he asks if you will join him. Being the adventure loving fellow that you are, of course you say yes and the two of you head off south toward the temple.
As far as the game mechanics go, the Courage attribute is completely abandoned here, but we have something much better in the form of one of my favourite styles of spell systems. As you travel along with Aalandrin, he realizes you would be more effective if you knew some magic, so he decides to teach you some. You here get the opportunity to learn 4 different one-use spells from a list of 9, and these include: Flight, Invisibility, Knowing, Translate, Circle of Darkness, Create Fire, Wrist Knife, Intuition, and Shield. Each spell also has an associated Strength cost that must be deducted when cast. The spells are very well implemented within the quest, and I found a place in which almost each one came in useful. The real tricky (and fun) part though is determining which spells you absolutely need to take, as there are items essential to victory that can only be obtained if you have the correct spell. By my count, there are 3 spells you will need to learn should you wish to win, which is probably a bit of overkill when it comes down to it, but I still greatly enjoyed figuring out for myself which of the spells were essential. Aalandrin also provides you with a Potion of Rejuvenation, which is also one-use and will restore your Strength score back to its initial value, but as with the Rations, it cannot be taken during combat.
So now that you are armed with your 4 spells, you and Aalandrin arrive at the temple and head on in. It is here that Aalandrin makes the bonehead suggestion that the two of you should split up (hasn't he ever seen a horror movie?), so whichever direction you choose to go at the first junction, he heads the other way, thus leaving you alone for the majority of the quest. Up until this point the adventure itself was feeling very lackluster, but thankfully the good stuff begins here. The temple is laid out as another patented Brunskill maze with multiple "you arrive at a junction, will you go North or South" options, but was at least a bit more fun to map than usual as it had some rooms to investigate, if even I still would have liked to have seen more creatures wandering around the passageways to encounter. (Although one of the rooms did have another cool spider-creature that I'm a sucker for). I don't know if perhaps I am just getting more familiar with this author's mapping style, but I had less trouble plotting this one out, even though my map still ended up being a bit wonky in a couple of places. Perhaps I'm just rolling with it more now. The good part though is that you will need to locate several different items hidden throughout the temple in order to win the adventure, and as mentioned earlier you will need to have chosen the correct spells in order to find these items. This made for some really nice experimentation and trial-and-error in discovering which spells you absolutely had to have, and which spells, while still useful, could be left unchosen. Once you mange to collect all the needed items, you will find yourself in the far reaches of the temple (after a brief reunion with Aalandrin) and are ready for the final fight against Tyran himself before reclaiming the stolen sceptre.
While experimenting with the spells and uncovering the locations of the needed items was the highlight of the adventure, the combat I found to be challenging in a good way as well. There are a couple of Dexterity-10 enemies to get past (although one can be bypassed with the correct spell), and with the final one also having a high Strength score, you will likely need a double digit Dexterity score yourself if you want a decent chance of winning. This is offset somewhat by having an early well placed Dexterity-9 Strength-14 enemy that will likely weed out any character not sufficient to win the final battle anyway. Because the spells cost you Strength points when you use them, I found myself in most playthroughs needing to use all my Rations along with the Potion of Rejuvenation, and even then every time I fought Tyran it came right down to the wire (it took me 3 attempts to finally beat him, with every fight ending with both of us at 4 Strength points or below, although I never did play as a Dexterity-12 character).
I have to give bonus points because I didn't come across any "truth-lie" riddles which was a plus, and a bit of a minor miracle for a Brunskill adventure. Although the puzzle I did come across here must surely be one of the easiest ones I have ever encountered. I guess Tyran needed to make this puzzle simple so that even his goblin guards would be able to get it right? There is also an odd angle in the adventure regarding The Temple of Eternal Darkness itself. This isn't just a spooky name, as the interior of the temple is always in perpetual darkness, with not even sunlight being able to penetrate the blackness. You get around this by having Aalandrin give you an additional "no-charge, always-in-use" power of Seeing, which illuminates everything a few feet around you much like a torch would. I'm not sure what the point of all this is. I suppose it's supposed to increase the atmosphere level, but it really doesn't play into the adventure in any way that I could see, and I think it all would have worked just the same if your character had indeed been carrying an actual torch. I did find Brunskill's writing very good throughout, and thankfully so because there are more than a few quite long sections to be read. The final section that sees you return the sceptre to the elves and save King Gallibran was a particular highlight in this area. I was disappointed though that I never got to learn what all the Fallagon business was about in the opening. Why did he want us dead so badly? Starting out with some mystery is always a good thing, but I need the mystery solved by the time I've finished the story!
I had to save for last a discussion of the Aalandrin character, because as an adventurer this guy sucks! It's a good thing he teaches you the all-important spells that you need, otherwise he would have made very little contribution at all. As mentioned, no sooner are you ten feet inside the temple when he ditches you at the first opportunity, leaving you to do all the heavy lifting alone. There are four different items you will need to find in order to reclaim the sceptre, but does he manage to locate ANY of them himself? Nah. You also save him from death twice (but not the third time unfortunately), and there are a couple of times that he is with you when you get involved in a fight, only to see him get completely jobbed out. Heck, he couldn't even get the stupid riddle! If this was the best guy the elves had to send out to reclaim the sceptre, they are in serious trouble. I will just tell myself that all their more competent members were wounded in the invasion by Tyran, and he was all they had left. None of this is really a negative to the adventure, but it certainly stuck out just how inept this fellow was.

Ranking: A new best entry in the series so far. Brunskill's writing has improved a little bit again, and while the story isn't all that great, the experimenting with the spells until you determine which ones you need to select in order to pass which necessary obstacles was great fun. I thought the challenge level was good too with this adventure being the first one to take me double digit attempts, while also not being daunting or frustrating. It's a shame the opening city area wasn't more interesting or this could have been even better. Maybe Brunskill just didn't want to peak too early. I hope he hasn't anyway, although it looks like it might be awhile before I get to his next one. Well done here though!
______________________________________________________________
8. Treasures of the Cursed Pyramid - Score = 💀💀💀💀 1/2 - Four and a Half Skulls
Attempts to Beat: 7

No sooner do I get through saying in the comments that I have yet to come across a great entry in the series, I am forced to eat my words because that is exactly what I got here with this adventure from author Elizabeth Caldwell. Probably not surprisingly based upon the title, this is an Egyptian themed adventure that opens with our character wandering around a bazaar in the city of Kiroona one day looking for some excitement, when something strange starts to happen. In a Twilight Zone type situation, it seems that in no matter which direction through the bazaar you begin to walk, you always find yourself arriving back at the same stall, that being a merchant selling "Relics and Curiosities". Deciding you have no choice but to then investigate this stall, you find yourself drawn to a particular black leather-bound book that this merchant is selling. The merchant attempts to dissuade you from buying the book (which begs the question as to why he had it out on his table for sale in the first place, unless he is perhaps using reverse psychology on you as a selling tactic), but enough gold eventually convinces him to part with it, and you then find that you are no longer continually directed back to this same market stall, and thus retire to your room at the local inn to examine your purchase. You then learn that you have bought a journal written by an archeologist known as Saal Merik, who around 100 years ago made a bit of a name for himself by discovering and exploring the ancient Pyramid of Ptah-hotep located nearby. Concealed within the final pages of the journal, Merik relates that he in fact also discovered a door which he believes leads to a hidden area within the Pyramid. However, Merik also warns off anyone from exploring this area, as the hieroglyphs on this door tell of a terrible evil contained behind it, namely the Spirit of Seth the Destroyer. He goes on to say that while he believes there to be great and priceless treasures within this secret area, the risk from unleashing this evil would be too great. (He probably would have been better off not mentioning the treasures then wouldn't he?). Evil schmevil, we want that treasure! So, unable to resist the lure of both riches and adventure, we set out for the Pyramid only a short distance away.
From a game mechanics standpoint, this adventure retains the usual Dexterity and Strength attributes, but replaces Courage with a Charm attribute. You roll up this Charm stat as you do the others, but unlike the others, you can go over your initial score up to a maximum of 12. You then lose or gain points in this stat depending upon things that befall you inside the Pyramid, and you can later be tested on this attribute at various times to see if you are able to resist the Curse of Seth, with the higher your Charm score the better your odds of succeeding. The Charm score alone isn't enough to stave off the curse though, as you learn that there are various hieroglyphs scattered around the pyramid. When all of the hieroglyphs are found and joined together, they form a phrase that you will need to learn should you wish to ultimately resist the curse once and for all and survive the final showdown with the evil Seth deep inside the Pyramid.
The real fun of the adventure is then exploring the Pyramid and locating all the hieroglyphs, and this aspect is a smashing success. While I have to admit that the hidden part of the Pyramid didn't seem all that well hidden (no one thought to press that indented eye in the last 100 years?), this is a minor quibble with how great everything played out, and who knows, perhaps you were specifically "chosen" to first find the journal and then enter the hidden area by Seth himself who wishes to be freed and is using supernatural abilities to help you get in. And while even though the adventure is a slightly longer than normal 225 sections, this still isn't enough of a section count to provide a really large pyramid, but thankfully what you do get to explore is wonderfully atmospheric and interesting and it sure felt like it was bigger than it actually was when looking at my map. There are many well done encounters that can be had with: a tomb robber, a sphinx, lions, a giant scorpion, and even several of the Egyptian gods themselves. It's not just the hieroglyphs you can uncover either, as there are statues, amulets, and scrolls that can also be found, some useful and some not. The middle section of the adventure even sees you entering a maze within the Pyramid that normally would have had me rolling my eyes with how empty it was as you plot your way through it, but Caldwell even ups the ante here by giving you only 14 moves to get out of the maze before you are buried alive in sand. This took what otherwise would have been a completely tedious exercise and gives it a nice degree of tension as you hope to stumble across the exit while watching your time slowly drain away. Even though there is a bit of a silly moment here where you can find yourself stepping on a false stone in the maze that sends you on some sort of amusement park "slide ride" that dumps you back outside the Pyramid. I did think this was somewhat amusing though, and if you find yourself on this slide then you were probably going to run out of time and die anyway as it is on the opposite side of the maze to the exit.
Once through the maze you are into the final stretch, which involves a tricky last confrontation with Seth that I really enjoyed, and a couple of double-digit Dexterity score enemies before you finally find out if you managed to locate all the hieroglyphs by needing to perform a bit of mathematical cheat-proofing on them in order to arrive at a section number to turn to. I would have preferred to have seen something involving the actual pictures in the hieroglyphs themselves to be used here that you needed to solve or translate, but perhaps this would have been too complicated to implement. Still, it serves its purpose, but even after arriving at the correct number based upon the meaning of the hieroglyphs, you then need to solve yet one more puzzle involving totems on some sort of chess board, and then upon so doing, you at last enter the final room containing all the promised treasures, and find yourself rich beyond your wildest dreams!
Special mention needs to be made of Caldwell's writing in this adventure, because it is wonderful stuff. The creation of atmosphere within the Pyramid is fantastic, and all the encounters you have, be it with beasts or gods, are so excellently described that they all seemed to leap off the page. Description wise, the maze wasn't quite up to the level of the rest of the adventure, but as mentioned, the time limit involved there helped to cover that up entirely. I also felt the final victory section could have been made a bit longer considering what we had just been through, but that is a very minor niggle. Caldwell also did her homework in using actual Egyptian gods instead of fictional ones for the adventure, although that then being the case I sort of wish she had just said outright at the beginning that this quest took place in actual Egypt and had you begin somewhere like Cairo as opposed to Kiroona, as I think that would have increased immersion even more, but again this is more of a wish than a complaint. Even with those couple of unfulfilled wishes, this is easily the best written magazine adventure I have yet read.
I debated giving this adventure 5 skulls, and came very close to doing so. Ultimately though there were a thing or two that detracted, one of which caused me to lower the score ever so slightly by half a skull. First of all, the room which can be visited right after first entering the Pyramid and where you can receive one of four different possible hints depending upon which jar you open, I felt spoiled a bit of the process of discovery and exploration. I would have preferred having to use trial-and-error yourself in order to determine which choices you should make later in the adventure. That said, you can choose to ignore this room completely (although I had already learned too much by the time I decided to do this), so this isn't too much of a negative. There is also a similar moment when you are given a riddle by a Sphinx, but instead of getting to use your brain power to solve it yourself, whether you get the riddle correct or not comes down to whether you have a certain item or not. If you have the item, your character automatically gets the riddle correct and you proceed. I would have preferred an actual puzzle here, especially from such a famous riddle-giver as a Sphinx. Finally, and this one is the reason I couldn't quite give this 5 skulls, but in order to obtain one of the hieroglyphs that is essential to beating the adventure, you need to pass a random 50/50 roll. No! Always frustrating and I still have no idea why authors do this. Fortunately I didn't get screwed over too badly myself by this roll, but I could definitely see this contributing to frustration (such as happened to me with Armies of Death from the "Fighting Fantasy" series) and possibly even more of a docking to the score by others than I have given it. This could be so easily fixed too.
Ranking: At the risk of sounding like a broken record lately.....best entry in the series so far! That's the second time in a row (and third time in the last four issues) I can say that, which speaks to the increasing growth in quality of the magazine up to this point. The writing here is excellent, the atmosphere is fantastic, the story and encounters are completely engrossing, and the design for the most part is very, very good. If the required 50/50 roll was removed and replaced with some kind of puzzle or interesting encounter (or replaced with just about anything for that matter) this would be 5 skulls. Even as it is though, this is one of the best magazine adventures I have played period, and not just from this series. I wonder if Caldwell will be able to top this one.
______________________________________________________________
9. Lord of Chaos - Score = 💀💀💀 - Three Skulls
Attempts to Beat: 6

Not as good as the previous issue, but expecting yet another improvement after that great entry was probably asking too much. However, I still found Lord of Chaos to be mostly enjoyable in its own right. We begin here playing as a "seasoned adventurer" who wanders into the walled city of Valantia one day and is immediately granted an audience with Glamarye, the beautiful and scantily clad leader of the city. It seems she has a mission for us, as legend tells that the arch-demon Uthergan (who calls himself the "Lord of Chaos") will soon rise from a Stonehenge-like monument and unleash havoc and destruction upon the land. So when exactly is this arch-demon supposed to rise? Why, at sunset of course. (Wait....today??? What would the city have done if you hadn't happened by?). Glamarye goes on to explain that the only way to defeat Uthergan is to locate the "four symbols of power", these being: a golden plate; a statuette; a collar of amber; and an urn. (Yeesh, someone had the "gamebook item randomizer" switch flipped on). Should you gather these 4 artefacts and then lay them within the mystical stone circle, Uthergan will be vanquished. Somewhat hopelessly, Glamarye can give you no direction as to where any of the artefacts may be found or even where the stone circle is located, but she does promise you 1000 gold pieces should you be successful. Accomplishing this all before sunset gives you about the same chance of success as a certain frozen spherical object surviving a certain underworld area of the afterlife, but we live for thrills so count us in!
So you set off from Valantia, and having absolutely no idea where to look, you just need to pick a direction and start hunting. This adventure repeats something that was done in The Mines of Malagus, in that you can doom yourself to failure right in the first section should you pick the wrong direction, but as with that entry, I don't have a problem with this as I fully hope to play a gamebook at least a few times anyway, exploring and experimenting with as much as possible along the way. And had fun exploring I did. You travel across plains and swamps, explore a cave or two, enter smaller villages, and get to encounter a fair amount of interesting characters and creatures. So despite the somewhat rubbish introduction, I enjoyed travelling from one end of the land to the other, mapping everything out as I went, and incrementally uncovering the locations of all the artefacts and what I needed to do to obtain them. On my first playthrough I only found the statuette. On my second playthrough I was able to find the collar of amber as well. On my third playthrough I then uncovered the location of the golden plate. It then took me a few more tries before I uncovered the secret to finding the urn, although I chalk this up to having to perform an action that felt incredibly foolish in order to learn the secret behind this artefact. Once I had found the urn and now had all the artefacts, winning was almost a foregone conclusion, as there is no final battle against Uthergan, instead it's a case of show up at the stone circle at the end of the adventure with all the artefacts and you win, don't have them all and you lose. Not having a final boss battle in itself is not necessarily a bad thing, I just think this adventure could have used it to add some flavour to the story, which is admittedly weak.
This adventure was a nice change of pace from most of the entries so far in one aspect, that being the setting. Many of the previous issues have taken place in underground or otherwise indoor complexes, and while there are a couple of small caves to explore here, the majority takes place in an outdoor setting, and a nicely described one at that. Sure, Shinderg's Tomb, The Forgotten City, and The Sceptre of the Elvenking all had outdoor stretches, but this was the first issue that felt like a proper overland quest. In fact, the atmosphere here reminded me a lot (in a good way) of Masks of Mayhem or Daggers of Darkness from the "Fighting Fantasy" series, with its focus on travel across grassy plains, marshland, and arid wastelands. There is also no proper maze to negotiate here, which is a nice change of pace as well. Don't get me wrong, the maze from the previous issue was very well done, but as a whole for the series they are starting to feel overused. However, I do think that this adventure would have been better served by having some additional mechanic added to it. The Courage stat is once again dropped for this issue, this time to be replaced with.....nothing. Yep, just the basics here. You have your Dexterity and Strength attributes and that's it. Ok sure, you have your Rations and your Gold, but those are pretty standard at this point, and this issue could have used something unique to help spice up the proceedings a bit more.
As far as any actual puzzles or riddles in the quest go, there was some good news and bad news on that front. The bad news is that unfortunately there is yet ANOTHER variation on the truth/lie riddle (this is a David Brunskill adventure after all), which makes the count 5 for 9 in issues which I know include at least one of these. The good news is that the puzzle you need to solve in order to obtain the golden plate artefact I thought might have been the best one in the series to date. In order to solve this you need to carefully read a parchment, take a close look at an illustration, and then apply some basic math to the numbers you find in order to arrive at the answer, which gives you the section number to turn to. I felt this was wonderfully balanced, as I had to put some thought into it, and while it wasn't overly onerous by any stretch, I also felt at least a degree of satisfaction for solving it. Gamebook designers take note. And speaking of Brunskill (and thanks to Ed Jolley for pointing out that the author of this issue, J.A. Collar, is another pseudonym for Brunskill), his writing is once again above average, if not quite on the level of Elizabeth Caldwell's from last issue, and I thought the atmosphere in most of the outdoor areas was very effective and nicely realized.
The combats along the winning path are not very tough, and as such, any difficulty in the adventure comes from uncovering the exact order in which to do everything. Oh there are some high Dexterity enemies that can be encountered, but should you run into any of them this means that you either went the wrong way, or failed to acquire an item that would have allowed you to bypass them. In addition to the required 4 artefacts, there are also a couple of particular items that I don't think it is possible to win without, which therefore means there are actually 6 essential things you need to find. I suppose you could argue there is a bit of a downside in having the steps required to win be so exact, as it could deter exploring once you figure out what you need to do in order to obtain each artefact, as you now can't deviate from that path (if you are trying to win on that playthrough at least). Still, there are more than a few gamebooks like this, several that I have rated very highly, so I don't personally hold this against the adventure. I view these kinds of adventures as big puzzles that need to be cracked and am quite happy to eventually work them out.
Ranking: As with The Fortress of Kruglach, this is going to be another shorter review as there isn't a great deal to talk about. The adventure doesn't do anything special, but what it does do it does enjoyably well. It made for a fun few evenings mapping out the landscape and piecing together the locations of everything I needed, and the writing was pretty good too. Although I will say that the plot itself was on the crappy side (I'm already starting to forget why the heck what my character did actually worked), and having no final battle against the big bad didn't help matters either. I put this one right around the middle of the pack so far, and slot it just behind Caverns of the Enchantress and just ahead of The Forgotten City in the rankings so far.
______________________________________________________________
10. The Triad of Evil - Score = 💀💀 - Two Skulls
Attempts to Beat: 16

What the hell happened here? How did author Elizabeth Caldwell go from the sublime Treasures of the Cursed Pyramid to this sub-par junk? Ok, perhaps "junk" is a bit harsh, as this adventure does have at least some merit. Unfortunately though, most of what merit it has is undone by several incredibly frustrating decisions, in regards to both the game design and the story. Starting with that story, here we are playing as an individual, who when very young, learned from their father about the legend of the Citadel of Llamar. It seems that long ago, Llamar served as the headquarters of The Knights of the Jewelled Heart, who were a symbol of all that was good and true in the world. Unfortunately, the forces of darkness (a bit vague here no?) one day managed to infect one of the Knights who had fallen ill, and were thus eventually able to kill the Knights and take over Llamar. Since that time, the forces of darkness have........well, they haven't done much of anything really, as there is no evidence they have ever ventured outside the Citadel. Despite that, your father decided to venture up to Llamar (by himself? even though all the Knights couldn't defeat the forces of darkness? That's either confidence or lunacy for you), which is located high in the mountains, in an attempt to overthrow the evil there. He was never seen again. (And I will be ranting about this later). Since that time, you have spent your life training to follow in your father's footsteps, and to confront the evil in Llamar yourself. This opening makes it feel like first your father, and then you, are the local town nutcases. Anyway, the adventure proper begins with you having already made the journey up into the mountains, and you now find yourself standing before the Citadel of Llamar, which you then enter in hopes of defeating "The Triad of Evil". (And for the majority of the adventure I had no idea what this "triad" was supposed to be.)
This adventure introduces a new mechanic in the form of Valour points in addition to the usual Dexterity and Strength. These points are not generated randomly to start, as you begin with 12 Valour points, and you can lose points as you make your way through the Citadel of Llamar should you encounter something particularly unnerving or horrific, with the idea being that this stat can then be tested at various times in the adventure to see if you can overcome evil at a key moment. At first this felt like a bit of a misnomer to me, as I would think you would gain Valour by overcoming horrific situations, but I suppose it's meant to reflect your resolve being slowly chipped away by everything terrible that you come across. In any case, this is an intriguing inclusion, but will also be the subject of another rant later in the review.
Immediately upon entering the Citadel, you discover an inscription on a wall, and realize it is a poem written in your father's handwriting! The inscription outlines a couple of items you will need to find in order to win the adventure, but why did it have to rhyme? It's starting to get a bit silly how all these important messages you come across in these adventures have to rhyme for some reason. I can just picture a dramatic death scene now:
"I did it!.......(gasp)....found a way to defeat Death himself.....too bad discovered secret too late....no hope for me....(wheeze)....must leave message before I die....tell others how to beat him.......have no writing materials......will have to scrawl message in my own blood.....(argghh!)......just need enough time to make it rhyme first....."
There is yet another Monty Python sketch in here somewhere. What really ticked me off though is how this whole angle regarding the disappearance of your father is never brought up throughout the whole quest again! What a huge wasted opportunity for a great moment later in the story. Perhaps you could have found your father still alive and trapped, and after freeing him the two of you go on to defeat the evil forces together. Or maybe you find your father has been turned into some form of evil, or even hideously mutated and pathetic creature that you now have to put out of his misery in a moment of extreme anguish for you. Or maybe it is revealed that your father has even been turned into the physical representation of one of the "triad", perhaps even Death himself, and you must face him in the final showdown. So many wonderful possibilities abound, but nah, we don't even get to so much as come across his skeleton. At least not anywhere that I could find, and I felt I explored pretty thoroughly. What an incredible shame.
One of the very first characters you can meet after proceeding past the opening inscription is the last remaining Knight of the Jewelled Heart, and it is in fact the very same Knight who fell ill long ago, and which allowed the forces of darkness to invade the Citadel. This Knight is locked inside a cell you come across, but has been granted eternal life from the evil within the Citadel so long as he doesn't leave the cell. His purpose being to warn any intruders on venturing any further, but he is also allowed to provide you with some helpful items (because the evil forces find it more pleasurable should you be given some hope before they destroy you.). This scene reminded me very much of the old knight holed up with the holy grail in "Indiana Jones and the Last Crusade". But guess what? Despite promising to help the Knight escape the cell and thus be allowed to die (which is what he longs for), this is yet another angle that is never brought up again even when you win the adventure! Oops, sorry buddy, guess you weren't that memorable after all.

From this point on you explore the Citadel in search of the items you were told you will need from your father's rotten poetry inscription, and this aspect is the only real positive of the adventure. The Citadel itself is at least interesting to explore and map out, and there are several thought provoking and well described rooms to investigate. A great deal of it has no real bearing on the adventure, but you don't realize this at the time, and I suppose it does make a degree of sense that you would have to sift through a lot of things unrelated to what you are actually there to do before eventually finding what you need. And while I enjoyed the layout of the rooms, there were a couple of encounters that did seem on the random side, even for a gamebook. For instance there is a dragon down here for some reason, which felt out of place in what I thought was otherwise a more horror themed as opposed to fantasy style quest. On that horror front, there is a group of cultists in the Citadel as well, although much like in House of Hell from the "Fighting Fantasy" series, if you find yourself meeting up with them you are (probably) a goner no matter what you do. (What do these cultists live off of anyway? I never came across any food stores down here and there doesn't appear to be any supply routes to the Citadel). And even though you would expect such a meeting in a horror theme, there is a vampire that appears out of nowhere with little explanation or purpose (and I presume he survives off the blood of the cultists, but I'm probably overthinking it now).
So once you have searched the rooms, tunnels, and caverns, and located the items you need, you are ready to proceed to the endgame and confront the evil "triad", which turns out to be the threesome of Death, Pain, and Fear, represented in human-like physical forms. And this is where the adventure gets incredibly frustrating on several levels. I will need to take each of the steps needed to defeat this group in turn:
1. Test your Valour. Ok, so all those Valour points you have been losing as you made your way through the Citadel are now about to come home to roost, as you are asked to make a Valour roll check. Roll equal to or under your current Valour score and you pass, roll over your score and you fail. Seeing as how important we have been lead to believe the Valour score is, this means there surely must be a lot riding on this test right? Nope! Fail the check and you suffer no penalty and go to the same place you would have gone had you passed it! In fact, I think failing this check might actually be the better outcome, as you are then not given silly options such as attacking Death with your sword. (Who does that?). This in effect renders the whole Valour concept pointless. There is a moment you can have earlier in the quest where you need to pass a Valour check to avoid being sucked into an evil mirror, but this sequence can (and should) be avoided anyway, so at the end of it all I was left with the feeling that this whole mechanic was a complete waste of time.
2. The dice game. So after that above bit of pointlessness, you then need to defeat Death in a dice game. Well ok, depending on how this plays out, this sounds like something that could be incredibly cool for an endgame. But then you slowly realize how it works, and just how completely random it all is. How it goes is, you roll one die, and if you get an odd number you go to one section, and if you get an even number you go to a different section. On both these sections, you roll one die again, with the outcome of this roll determining what happens depending upon whether you roll a 1-2, 3-4, or 5-6. This thus gives you 6 possible outcomes. Those outcomes end up being:
Outcome #1 - Gain 2 Strength and 2 Valour points (what the f#&! is the point of the latter? Valour points don't matter anymore, and they never did!). Roll again.
Outcome #2 - Neutral. Roll again
Outcome #3 - If you have the items you were required to gather, YOU WIN!. This is obviously the outcome you want.
Outcome #4 - INSTANT DEATH!
Outcome #5 - Lose 6 Strength points
Outcome #6 - Lose 4 Valour points (again....what the bloody hell is the point of this?)
So as you can see, your odds of surviving this total randomness is at best 50/50, and maybe even a bit less as that Outcome #1 Strength gain does not make up for the Strength loss in Outcome #5, although this will obviously depend upon how much Strength you had when you began the dice game. In addition, I found this to be both frustrating and tedious at the same time. On one occasion I found myself repeatedly rolling Outcomes #1, #2, and #6, and then found myself alone at my desk actually shouting out loud "this is ridiculous!". And imagine the poor sap who continually makes it to the end of the adventure over and over again only to continually land on Outcome #4. Even when I did win, there was no thrill of victory.
Thus, after finally getting the luck required to win the dice game, your character uses the items acquired within the Citadel in an extremely odd manner (you hurl 3 golden wafers (?) as if they were shuriken at Death, Pain and Fear), banishing them all back from whence they came. You then stumble back through the Citadel and out the front door to make your way back home again, content in your victory and completely forgetting about both your father and the cursed Knight that you promised to help earlier (didn't you pass him again on your way out? Awk-ward!)
In addition to all of the above, even Caldwell's writing, which has always been a strong point, seems to have taken a step backwards. It's not bad by any means, but it lacks the incredible description that we saw in her previous adventure in particular. Many of the sections felt quite terse, and perhaps this is a byproduct of this adventure being 250 sections long as opposed to the usual 200. The increased section count should in theory lead to a more fleshed out quest, but that really wasn't the case. In fact, there is a noticeable amount of filler sections here, and I wonder if Caldwell originally had a 230 or so section adventure and was told to increase it to 250, and thus needed to conspicuously stretch to get there. There are some puzzles in the adventure as well, and I thought they were decent, if nothing special. I will admit though to being stumped by the wall safe puzzle. This puzzle involves you needing to insert pegs into two five- pointed stars, with each star having holes at each of its five points. The clue you are given reads:
"Three by three and two by two,
Be warned, take care in what you do"
Aside from that last line being totally useless (and was obviously included because, as mentioned earlier, EVERY inscription in existence needs to rhyme!), the options you are given are to either: (a) put pegs in each of the number 5 holes (b) put pegs in each of the number 3 holes, or (c) put pegs in both number 3 holes AND both number 2 holes. It seemed to me like you could interpret the clue to mean any one of those options, so I was left with resorting to just guessing, but perhaps others can see something I missed.
Overall I found this to be the most difficult Proteus adventure so far, mostly due to the frustratingly random frigging end game, but there were other reasons too. There is an essential item that in order to obtain you must defeat a creature called a Soul Eater. The thing here is that if the Soul Eater rolls a 12 on their attack, it means automatic death for you. These odds don't sound so bad, until you die due to this a couple of times in a row, and several times overall. The adventure also seemed to contain more instant deaths than I would have liked to have seen, and in a waste of some good ideas there are several interesting places you can find yourself in (a room full of cultists, an underground lake, a strange room with a mystical mirror and light-filled boxes) where no good can come from anything you do.
And finally, returning to the subject of filler sections, there were times playing this adventure where I thought I was back reading the "Real Life" series again, with its meaningless decisions scattered throughout. The ending test of the Valour points was the biggest example of this, but there were others as well, such as this gem:
Section 240 - if you are suffering from a fever, turn to 233, if not, turn to 215
Section 233 - you take a drink of water and go to 215
Section 215 - you continue Eastwards
or this one:
Section 213 - will you examine the right hand door, turn to 231, or will you examine the left hand door, turn to 185
Section 231 - the door is locked, you try the left hand door instead, turn to 185
Section 185 - the door is unlocked and you walk through
What fun!
Ranking: Two skulls probably seems generous after the above review, and maybe it is, but I did think it was "ok" until it came crashing down at the end. It's as if Caldwell carefully plotted out and designed Treasures of the Cursed Pyramid over many weeks, then just threw The Triad of Evil together over a couple of days. Exploring the Citadel itself was a mostly fun part of this adventure, and there are some interesting things to discover and good ideas behind the scenes here. The story however doesn't make a heck of a lot of sense, and even badly botches some opportunities for some really cool moments. The game design is pretty bad in several places also, with a maddeningly random end game and the rendering of the Valour points so as to be almost meaningless standing out in particular. I hope Caldwell can return to her earlier form in her next adventure, because this was a big step back in all areas.
Always interesting to see your views on the dustier and more neglected corners of the '80s gamebook world. Proteus does get better after the first couple, I seem to remember - they were never the most innovative series, but a reliable enough way to ride out the growing gaps in the FF publishing schedule. And for only 80p a go as well! I'll be interested to see why you think it managed to outlive Warlock, but I guess that's a question for later on down the line.
ReplyDeleteProteus does get better after the first couple
DeleteI'd say 'first few' rather than 'first couple', as I consider issue 3 to be one of the worst adventures published by Proteus (though not as bad as the full-length adventure in issue 15).
As for The Tower of Terror, my review and playthrough both rate it as nothing special but far from awful, and nothing has happened to change my view in the intervening years.
Thanks Ben. I highly recommend checking out Ed's blog (if you haven't already that is) that he linked above as he covers some series that I had never even heard of. I do now kind of wonder why Warlock ended when it did when Proteus managed to push on for a couple more years. Did you manage to find them when they first came out? Can't say I ever saw them back in the 80's.
DeleteI'm looking forward to reading your playthrough of issue #2 when I finish it Ed. I'm having a bear of a time with one particular aspect and I'm extremely curious to learn if you had the same problem!
Oh, Ed is undeniably the authority when it comes to this stuff - he's definitely the one to listen to (and his reviews on Demian Katz's indispensable site are great, especially the Ruth Pracy one). I did actually have a couple of issues of Proteus in the 80s, although was a latecomer and never bought it religiously. I suspect I blagged most of my small collection from friends, since my parents tended to take a dim view of anything they did not regard as a 'proper' book. Anyway, looking forward to what you make of the Mines of Malagus!
ReplyDeleteMapping out the Mines of Malagus.....the horror, oh the horror!
DeleteI don't know this one very well, but it sounds like a bit of an improvement over the fairly underwhelming Tower of Terror; I might be tempted to give it a spin. Incidentally, I can't be the only person to notice this, but doesn't 'Viki Llundsbrand' look like an anagram of the previous author's name? What's the story there, I wonder?
DeleteApparently David Brunskill has gone on the record as saying that he wrote issues 2 and 9 of Proteus under pseudonyms. And, more bizarrely, that he didn't write the adventure in issue 20 which is attributed to him. Demian Katz may know more about the whys and wherefores.
DeleteI didn't initially spot the anagram, but noticing the same malapropism in Mines and issue 7, which is attributed to Mr Brunskill, raised my suspicions a while before Demian was able to obtain confirmation that both authors were the same person.
All very strange! Having seen a copy of #20, I can see why the real author would want to distance themselves from it...but it seems unfair to foist it on Brunskill, especially since he seems to have pulled back as assistant editor from #15, and writer from #16. It's odd that he would be asked to conceal his name on the one hand (assuming the noms de plume weren't his choice), and then have it treated as a major selling point on the other. It looks like Proteus imported FF's shabby treatment of contributing writers along with its game system...
DeleteAs regards mapping, you've inspired a brief post on my blog.
ReplyDeleteI don't know about most of the monsters in Mines, but Nasnas are definitely an established mythical creature. IIRC, they're Persian in origin.
It's disappointing that they're just a generic hostile creature to fight - surely something interesting could have been done with the fact that a Nasna is essentially half a human. If the two of them attacked simultaneously, and you had to try and stop them from combining into a single, more powerful being, that could have made for a much more distinctive encounter.
Mapping will be even less fun in Shinderg's Tomb, but the series does get better (with one significant stumble) once you're past that shambles.
I guess I tempted fate complaining about mapping The Mines of Malagus because wow, Shinderg's Tomb. You sure weren't kidding. Somebody shoot me.
DeleteShinderg's Tomb is IMO one of the two worst Proteus adventures. I rank it slightly above the main one from issue 15, as it doesn't require you to get your facts wrong to solve a puzzle, but it's still dreadful.
ReplyDeleteYour review gives the impression that you missed one detail of the maze - it actually has two exits, each using a different combination of coloured keys, so only one of the seven types serves no purpose whatsoever. I think one of the exits may be less hazardous than the other, but it's in the region of 20 years since I reviewed Tomb, so I don't remember the specifics, and I have zero motivation to go back and check. Still, that does provide a sliver of justification for the lack of clues as to which are the right keys - depending on which exit you find, any of them could potentially be wrong (and only one is never going to be right).
Incredible to think that after all that time spent wandering around that maze, there were still sections I never saw!
DeleteI just read your review on gamebooks.org and was pleased to see (in a misery loves company sort of way) that you were annoyed by the same instant death that I was, if perhaps for a different reason. Although I will concede that being punished for heading in the direction you are supposed to be heading is probably the worse sin, as there was absolutely no reason to go South there.
IIRC, there are four other Proteus adventures written by Mr Brunskill. In my opinion, his last one (issue 16) is his best.
ReplyDeleteAs for The Forgotten City, I've failed that blasted Courage roll too many times to consider this an easy adventure, but it's certainly less headache-inducing than the previous one.
Some of the section count you missed is taken up with a pretty elaborate dead end. Not an element of the adventure I remember well, as I try to steer clear of no-win situations, but I do recall that solving a puzzle (and doing the right thing straight afterwards) provides an opportunity to turn back shortly before the choice between failure and failure.
Yes there is always that feeling of uncertainty when beating an adventure on the first try if perhaps I was just fortuitous at the proper moments.
DeleteI almost wish I had lost the final battle just so I could go back and try new things. I still could of course, but I find that tough to do when the "thrill of victory" is gone. Although an elaborate dead end would have likely just annoyed me, so I guess it worked out for the best!
I must say , you are powering through this series at a rate of knots !
ReplyDeleteI'm fairly sure I bought issue 2 back in the day. Mind you, it was the ONLY issue I ever bought or indeed even saw in the shops.
PROTEUS always struck me as a poor man's FF. Or should that be a poor man's WARLOCK magazine.
Thankfully issue #3 wasn't the only one you bought! I am trying to savor these as much as possible, but yes obviously a much quicker read than a standard gamebook. That's ok though, I need to make up for those books that take me 2-3 weeks to beat!
DeleteElizabeth Caldwell was almost as prolific a writer for Proteus as David Brunskill, and while I didn't get the same impression of 'improving with experience' from her adventures that I did from Mr Brunskill's, even her weaker contributions to the range still have merit.
ReplyDeleteThere was also included an illustration of a girl chained to a wall, which would actually be something that an enchantress would use to entice an invading adventurer, but it made me wonder if this was included for titillation purposes for the mostly school-age male audience who would not have access to, ahem, certain periodicals of the day.
Give it another two or three issues, and then we can really talk about Proteus and titillation for adolescent male readers.
I guess "sex sells"! Now I'm curious to see how far they are willing to go with it.
DeleteThere's a puzzle in Space Assassin where Roy G Biv comes in handy but I guess you missed it!
ReplyDeleteOh boy, testing my memory as that was awhile ago for me now ha! Do you remember where it was? I'm wondering if: a) I never encountered it. b) I did encounter it but have since forgotten all about it. or c) I did encounter it but didn't even realize Roy G Biv had anything to do with it.
DeleteIt's quite early in. You can find a metal box with three coloured buttons - if you press them following the Roy G Biv sequence, it opens and you find a gravity bomb inside. Follow a different sequence and the gravity bomb explodes, killing you. Admittedly there's zero indication you should follow Roy G Biv so option c is a distinct possibility.
DeleteYes that does sound familiar so I think it was option c. Wow there actually was somewhere to put that knowledge to use and I missed it!
DeleteThere's not really a lot to say about Fortress, though the write-up at my blog includes a bit of a rant about some of the section number padding.
ReplyDeleteThe next issue should be more of a challenge. Make sure to read it carefully, because there's an important detail buried in the middle of a lengthy paragraph at one point, and skim-reading at the wrong moment can cause frustration.
Very enjoyable write-up! And yes the padding was particularly noticeable in this one wasn't it?
DeleteThank you for the heads-up on the important detail. Reminds me of a lesson I learned a long while ago on always making sure to read the rules completely for every entry no matter how many in a series you may have already played. I could see players easily not noticing the rules in Proteus changing from 1D+8 to 1D+6 for Dexterity starting with issue 5 and getting caught out by it. And for all I know they change again at some point.
Issue 7 sounds quite generic (Gallibran?!) and seems to have a few wasted opportunities (Fallagon, the temple's darkness, having to choose 3 essential spells, an overly easy puzzle, a companion who disappears) - surprised it scored so highly. I haven't played any of these but some of the earlier ones sounded a bit better based on your write-ups.
ReplyDeleteWell I'm not saying it's great or anything, but experimenting with the spells while exploring the temple has been probably my favorite part of any of the adventures so far and gives it a slight edge over issue 5. I haven't come across one I would say is great yet. And thankfully your elf companion here wasn't named Blueswift!
Delete😅
DeleteThere are hints in the text that Fallagon and his cronies just want to keep you from helping the Elves. At the start you have an intuition that you’re about to embark on a new Quest, and Fallagon makes clear his intent to prevent you from succeeding in it, while Ravellia, who basically sets up your first encounter with Aalandrin, describes herself as ‘no friend of Fallagon and his clan’. This could be said to raise more questions than it answers, but it does provide a glimpse of a bigger picture.
ReplyDeleteAllandrin isn’t completely useless: he does find the receptacle of one essential item and pass it to you to open. Not much of a contribution, but I can think of gamebook sidekicks who do less.
David Brunskill wrote issue 9 of Proteus under another pseudonym, so the next of his adventures isn’t as far off as you think.
Fallagon attacks you himself though while his men stand back, which made it seem like it was personal. And this happens before you even talk to any elves. I would have liked to have known more about what is going on there, although maybe I missed an encounter that would have explained more.
DeleteWasn't aware that issue 9 was another Brunskill issue. Do you happen to know why he writes some of them under pseudonyms? The magazine is starting to feel like it was his "baby" from the start.
There is a potential encounter with Kathep, Fallagon's successor, who comments that, "You have saved me a job, Stranger - Fallagon's time was due." This suggests that the one-on-one fight wasn't so much a personal thing as a last-ditch attempt to demonstrate to the group that he was still fit to lead them, hoping to deter Kathep from making a bid for promotion via the 'dead man's shoes' route.
DeleteI don't know why the pseudonyms were used. The first one might have been to make Proteus look less like a one-man project, but I have no idea why issue 9 was published under another name.
Treasures is my favourite Egyptian-themed gamebook, and one of my top 5 issues of Proteus. Glad to see that you enjoyed it too.
ReplyDeleteRegrettably, rolls like the one that you complained about will be a feature of Ms. Caldwell's adventures from now on. Some can be skipped, but at least two are unavoidable. And if you don't manage to miss the one in issue 10, I anticipate ranting.
Those rolls probably bother me less than they did when I first got back into gamebooks just because I am much more used to them, but they still annoy and deserve mention. It's unfortunate that someone's experience with a book could be tarnished just by one single roll continually going against them.
DeleteThe Egyptian theme really is a great one for gamebooks. I'm not sure how many more I have to look forward to though other than Curse of the Mummy and the Herbie Brennan one from the 90's.
I'd heard good things about Treasures before, definitely sounds like it lives up to that reputation.
ReplyDeleteI wonder why talented gamebook designers like Caldwell or Brunskill were never snapped up by Fighting Fantasy?
I hope you get to play it sometime Kieran!
DeleteI wonder if just by participating in a rival magazine to Warlock if they put themselves on some kind of FF blacklist?
Glad to see Pyramid getting some well-deserved praise - especially in such a wise and witty review, which says nothing I'd disagree with. Here's an odd thing about it, though - although quite a few other gamebooks make use of the Egyptian (or quasi-Egyptian) setting, this seems to be just about the only one that didn't kill its series stone dead. Warlock, the Puffin Fighting Fantasies, Herbie Brennan's Adventure Gamebooks, Virtual Reality (sort of), all bit the (desert) dust after dabbling with pharaohs, mummies, and sphinxes. Even Golden Dragon's last original adventure fits the pattern. Perhaps there is some sort of King Tut-esque curse at work...
ReplyDeleteI hadn't thought about it before but you are right! The Forbidden Gateway series was another one that ended with an Egyptian-themed book!
DeleteI missed that one, but you are right - it is looking like a grand unifying theory! It's a shame the same can't be said of Legends of Skyfall, which certainly deserved to be canned after that awful second book.
DeleteLord of Chaos is pretty unremarkable. Still, the other David Brunskill adventures yet to come continue the general upward trend, so this is just a slight misstep. Pure speculation, but maybe the pen name was because he knew he was capable of better.
ReplyDeleteIMO, issue 10 is also a step down from its writer's previous adventure. Still, it has its moments.
He definitely has some skill. As Kieran alluded to, it's a shame he didn't get to write a full-length gamebook. If not for Fighting Fantasy then for someone else. Unless maybe he did under another pseudonym that I'm not aware of as that seems to be his thing!
DeleteFor what its worth, I've finally posted a new review ( ASSASSINS OF ALLANSIA ) on my FF blog here :
ReplyDeletehttps://fightingfantastical.blogspot.com/2023/
It will probably be awhile before I get to that book, but when I do I will be sure to check out your review!
DeleteThanks John, just added another review - for SECRETS OF SALAMONIS. Kind of hard to avoid spoilers !
ReplyDeleteAh that's a shame Issue 10 saw a dip in quality. What series is next on the horizon?
ReplyDeleteNext up is a short two book series,
Deletethat has "intrigued" me with its "web",
Hopefully I can have them finished,
Before the end of Feb
Damn! The rhyming is contagious! :)
😄
DeleteI think Triad is Ms Caldwell's worst contribution to Proteus, and would agree with all the criticisms you made (indeed, I'm pretty sure I made most of them in my review).
ReplyDeleteOne potential improvement that occurred to me: if you successfully use the Eye of Truth (which, despite being hyped up in the poem, does you minor harm at best (and destroys you at worst) as things stand), the vision you have reveals how to use the necessary items to destroy the Triad. Should you see that vision, if you subsequently succeed at that (currently pointless) climactic Valour roll, you can skip the whole tedious 'dicing with Death' business and go straight to the 'do you have everything you need' check. Miss the vision or fail the roll, and you're on the random route to victory or failure at the final hurdle.
Not a perfect fix by any means, but it makes the sub-quest for the Eye less of a fool's errand, gives some significance to Valour, and can make for a less arbitrary endgame, all of which seem like positives to me.
I guess I shouldn't be surprised that I hit on the same criticisms as you did, because the problems with this one really stand out and punch you in the face.
DeleteLove the suggestion by the way. A separate mini-quest that allowed you to bypass the dice game would have been greatly appreciated by me I can tell you that! I like how it would punish you for not getting the Eye, but not necessarily rule out victory either.